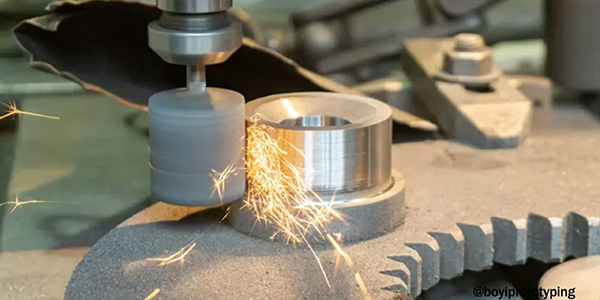
When a machined part leaves the shop, its geometry is done. The tolerances are hit. The features are correct. But one question often comes up later: how do you know which part this is, which revision it belongs to, or which way it goes in? Most teams reach for a sticker or a marker. But stickers fall off. Ink fades. And if the part goes through blasting, coating, or repeated handling, surface marks that were not properly cut will not survive.
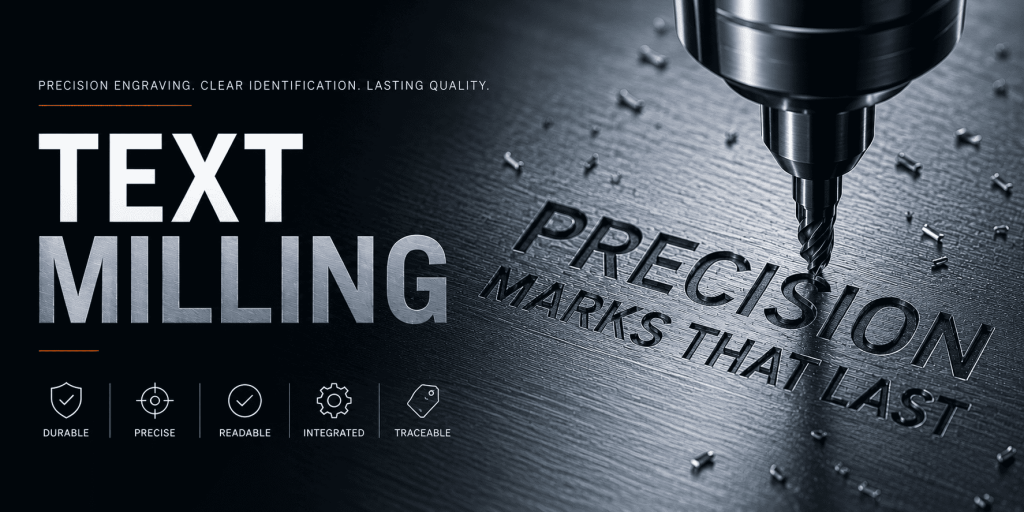
Text milling solves this by cutting the information directly into the part surface. No adhesive. No ink. The mark is removed material, which means it stays with the part through finishing, assembly, and use.
This guide covers how text milling works, how it differs from regular CNC milling, what affects readability, and what to include when requesting it in an RFQ.
What Is Text Milling in CNC Machining?

Text milling is a CNC machining process used to cut readable text, numbers, symbols, logos, or labels into the surface of a part.
It is commonly used for:
- Part numbers
- Serial numbers
- Batch codes
- Revision marks
- Logos
- Warning labels
- Direction arrows
- Fixture and tool labels
- Assembly instructions
- Prototype identification marks
The goal is not only to make the part look finished. In many cases, the mark helps people identify, assemble, inspect, track, or maintain the part correctly.
For example, a serial number can support traceability. A direction arrow can reduce assembly mistakes. A revision mark can help engineers separate prototype versions during testing.
Text milling is closely related to CNC engraving, but the focus is narrower. CNC engraving may include decorative artwork, patterns, and symbols. Text milling usually focuses on readable information that needs to stay on the part.
How Text Milling Works
Text milling usually starts with a marking requirement on a drawing, CAD file, or RFQ note. The manufacturer takes the text, logo, number, or symbol and turns it into a CNC toolpath. From there, the process follows the normal CNC programming chain:
Marking requirement → CAD/CAM setup →Toolpath → G-code → CNC cutting →Inspection
The amount of work each step requires depends on the mark itself. A large part number on a flat aluminum plate is usually straightforward to program and cut. A small logo on a curved plastic housing is a different problem — the programmer may need cleaner vector geometry, a smaller cutter, a slower feed rate, or a wider stroke width just to get a readable result.
In most cases, text milling is added to the existing CNC machining workflow rather than run as a separate operation. If the part is already on the machine, the mark is typically cut before deburring, finishing, or final inspection.
Note: Define the marking requirement early in the design process. Text added late in the drawing stage often ends up in a problematic location — too close to an edge, too small for the available c
How Text Milling Is Different from Regular CNC Milling
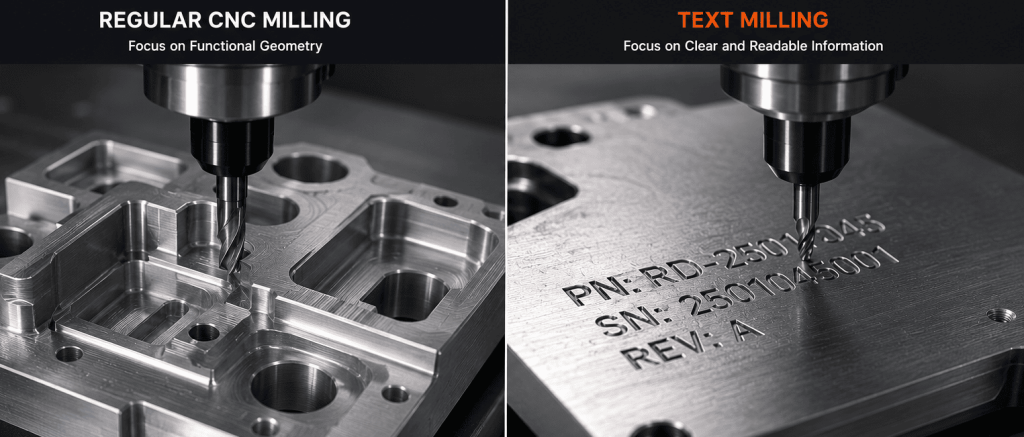
Regular CNC milling focuses on the functional geometry of a part, creating features such as flat faces, slots, pockets, profiles, chamfers, and complex 3D surfaces. A typical CNC milling process may also include hole-making operations like drilling, reaming, boring, and tapping.
Text milling, by contrast, focuses on creating clear and readable information on the part surface.
Although both processes use CNC cutting tools and material removal machining, their manufacturing priorities are fundamentally different. Regular CNC milling focuses on dimensional accuracy, assembly fit, and mechanical performance, while text milling prioritizes readability, visibility, and marking durability.
The table below summarizes the main differences between regular CNC milling and text milling.
| Point | Regular CNC Milling | Text Milling |
|---|---|---|
|
Main goal |
Create functional geometry |
Add readable information |
|
Typical result |
Faces, pockets, slots, profiles, chamfers, and related hole features |
Text, numbers, logos, arrows, labels, or symbols |
|
Main concern |
Fit, tolerance, surface finish, and function |
Readability, depth, position, and edge clarity |
|
Common failure |
The part does not fit or perform correctly |
The mark is unclear, shallow, burred, or hard to read |
|
Inspection focus |
Dimensions, tolerance, finish, and fit |
Text clarity, location, depth, and legibility after finishing |
The difference becomes more apparent in real production scenarios.
In regular CNC milling, dimensional accuracy and functional fit are the primary concerns. Even a slightly undersized slot may prevent proper assembly or mechanical movement.
In text milling, readability and marking durability are often more important than tight dimensional tolerances. A serial number or logo that is too shallow may fade or disappear after polishing, sandblasting, coating, or repeated handling.
Why Text Milling Is Not Just Small Milling
Text milling may look like normal milling at a smaller scale, but that view misses the main difficulty.
Letters are not simple cuts. They have thin strokes, curves, corners, inside gaps, and spacing. A font that looks clean on a screen may not machine cleanly on a real part.

For example:
- A small “A” may have an inside gap too narrow for the cutter.
- A “B” may lose edge clarity if the tool is too large.
- A logo may include thin lines that cannot be cut at the requested size.
- A shallow mark may look clear after machining but become weak after finishing.
- A decorative font may create rough edges, broken details, or unreadable characters.
The CNC machine does not fix a bad marking design. It follows the toolpath within the limits of the cutter, material, setup, and machine condition.
This is why text milling is both a machining issue and a design issue. Clean text depends on decisions made before machining starts.
Tools and Materials Used for Text Milling
Text milling usually uses smaller tools than regular milling because the details are smaller.
Smaller tools can create finer marks, but they are also more sensitive. Tool runout, vibration, dull cutting edges, poor chip removal, or excessive depth can make letters rough or cause tool breakage.
Material also changes the result.
Aluminum often cuts cleanly and can hold sharp engraved marks. Stainless steel is stronger and more wear-resistant, but it increases tool load and tool wear. Brass can produce clean cosmetic marks. Titanium can be marked, but cutting heat, tool condition, speed, and feed need closer control.
Plastics behave differently. Heat is often the main risk. If the cutter rubs instead of cutting, plastic can smear, melt, or leave fuzzy edges. Nylon may flex during cutting. Acrylic can chip or show stress marks. Polycarbonate may show visible tool paths or surface damage. POM, also known as Delrin, usually machines cleanly but still needs sharp tools for small lettering. PEEK can hold durable marks, but it requires controlled cutting and proper tooling.
The material affects more than the cutting speed. It also affects font size, engraving depth, cutter choice, burr risk, and finishing plan.
Design Rules for Cleaner Text Milling
The best time to improve text milling quality is before machining starts. Small design decisions can significantly affect readability, machining efficiency, and marking durability.
Choose a Machining-Friendly Font
Start with the font. Simple sans-serif fonts are usually safer than decorative fonts. Thin serifs, tight curves, narrow gaps, and complex details may look good on a screen but machine poorly at small sizes. Single-line fonts can also work well for small labels or serial numbers because the toolpath is simpler.
Match the Text Size to the Cutter
This is one of the most common failure points in text milling. The cutter must fit inside the letter geometry. If the tool cannot properly enter the internal spaces of a character, the text may blur, close up, or lose its intended shape.
Select a Suitable Marking Location
Choose the marking location with the same care as any other machined feature. A flat, open surface is usually the safest option. Curved surfaces, thin walls, deep recesses, and obstructed areas may require slower machining strategies, special tooling, or even a different marking method.
Consider Surface Finishing Early
Do not ignore finishing processes. Bead blasting, polishing, painting, coating, and aluminum anodizing can all affect how engraved text appears. A shallow mark may look clean immediately after machining but become difficult to read after finishing. If the marking must remain visible, the engraving depth and width should be planned accordingly.
Use Vector Files for Logos
For logos and graphic marks, vector files are strongly recommended. DXF, SVG, AI, or CAD geometry usually produces better machining results than low-resolution images. Poor image quality often creates additional cleanup work and may lead to distorted or inaccurate marks.
Before approving the design, check the following items:
| Item to Confirm | Why It Matters |
|---|---|
|
Exact text |
Prevents wrong labels, part numbers, or serial marks |
|
Text height |
Controls whether the cutter can form the letters clearly |
|
Font style |
Affects readability and toolpath quality |
|
Engraving depth |
Affects durability, appearance, and cycle time |
|
Text location |
Affects tool access and part risk |
|
Material |
Changes burr, heat, smearing, and tool wear risk |
|
Surface finish |
Can improve or reduce readability |
|
Same or variable text |
Serial numbers may require extra programming |
|
Logo file type |
Clean vector files reduce cleanup and toolpath errors |
Text Milling vs Laser Marking, Printing, and Labels
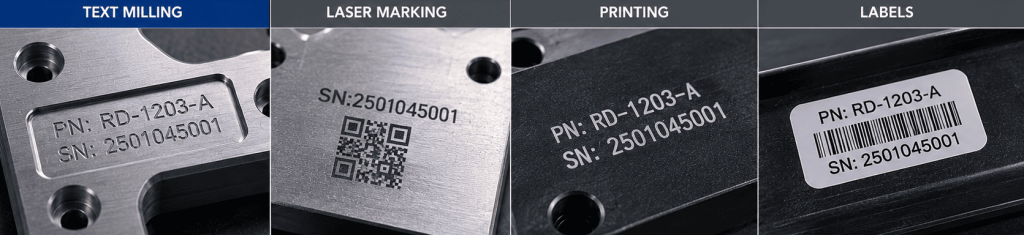
Text milling is not the best marking method for every part.
It is often useful when the mark needs physical depth or must remain readable after handling, cleaning, assembly, or surface wear. It also makes sense when the part is already being CNC machined and the marking can be added as another programmed operation.
Laser marking may be better for very small codes, QR codes, fast variable serial numbers, or high-volume marking. Printing may be better when color contrast matters more than depth. Labels may be enough for temporary identification or low-risk internal use.
| Requirement | Often Better Choice |
|---|---|
|
Deep physical mark |
Text milling |
|
Mark added during CNC machining |
Text milling |
|
Very small QR code |
Laser marking |
|
Fast variable serial numbers |
Laser marking |
|
Strong color contrast |
Printing, filling, or laser marking |
|
Temporary identification |
Label or printed mark |
|
No surface cut allowed |
Laser marking, printing, or label |
The right choice depends on material, mark size, quantity, finish, use environment, and inspection needs. A deep milled mark is not automatically better than a laser mark. A laser mark is not automatically better than a milled mark. The best method is the one that meets the part’s readability, durability, appearance, and cost requirements.
How Text Milling Affects Cost and RFQ Requirements
Text milling cost is usually driven by detail.
More characters mean longer toolpaths. Smaller text may require smaller tools and slower cutting. Deeper marks may need more passes. A complex logo may need vector cleanup before programming. Variable serial numbers may require extra setup or data control.
Material and finishing also affect cost. Hard metals can increase tool wear. Plastics may need better heat control. If the mark must remain readable after finishing, the supplier may need to adjust the depth, width, or marking method.
A vague RFQ creates avoidable back-and-forth.
“Engrave logo” is not enough. “Add text here” is not enough. The supplier still needs to know where the mark goes, how large it should be, whether the text changes between parts, what finish will be applied, and what “readable” means for your application.
When requesting text milling, include:
- Exact text or serial number format
- Mark location on the drawing or CAD model
- Preferred font or font style
- Text height
- Mark depth, if known
- Material
- Surface finish
- Quantity
- Same text or variable text
- Vector logo file, if needed
- Readability requirement after finishing or use
If you do not know the best depth, font, or minimum text height, describe the function instead.
- Readable after bead blasting
- Permanent serial number for traceability
- Logo on a visible cosmetic surface
- Assembly direction arrow
- Prototype revision code
That gives the supplier enough context to check tool access, cutter size, depth, material behavior, finishing risk, and inspection needs before quoting.
Conclusion
Text milling is a practical way to add durable and readable information directly to CNC machined parts. When planned early in the manufacturing process, it can improve part identification, traceability, inspection, and assembly efficiency.
Successful text milling depends on more than simply engraving letters onto a surface. Font selection, cutter size, marking depth, surface finishing, and material behavior all affect the final result.
At Xmake, we help engineers integrate text milling into CNC machining workflows from prototyping to production, ensuring markings remain clear, machinable, and production-ready. Upload your drawing today and get a quote within 24 hours.
FAQ
Q1: Is text milling the same as CNC engraving?
A: They are closely related, but not exactly the same. Text milling usually refers to cutting readable letters, numbers, labels, logos, or symbols into a part surface. CNC engraving is broader and can also include decorative patterns, artwork, and non-text features.
Q2: What is text milling used for?
A: Text milling is used for part numbers, serial numbers, logos, batch codes, warning labels, assembly marks, direction arrows, prototype revision marks, and other readable information on machined parts.
Q3:Can text milling be used on plastic parts?
A: Yes. Text milling can be used on plastics such as ABS, POM, nylon, acrylic, polycarbonate, and PEEK. The main risks are heat, melting, smearing, burrs, fuzzy edges, and visible tool marks. Sharp tools and good chip removal help improve results.
Q4: What font is best for text milling?
A: Simple sans-serif fonts are usually best. They have clean strokes and fewer small details. Single-line fonts can also work well for small text because they create simpler toolpaths.
Q5: Is text milling better than laser marking?
A: Not always. Text milling is often useful when the mark needs physical depth. Laser marking is often better for very small marks, QR codes, fast variable serial numbers, and high-volume marking.
Q6: Should text milling be done before or after finishing?
A: It depends on the finish. Polishing, blasting, painting, coating, and aluminum anodizing can change how the mark looks. The supplier should check whether the text will remain readable after finishing.